Difference between revisions of "Creating VMware Server 2.0 Virtual Machines"
(New page: So far this book has focused on installing VMware Server 2.0 and gaining familiarity with the VI Web Access interface. The purpose of VMware Server is, of course, the creation of one or mo...) |
(→Accessing the Create Virtual Machine Wizard) |
||
| Line 9: | Line 9: | ||
* From the ''Virtual Machine'' menu option select ''Create Virtual Machine'' | * From the ''Virtual Machine'' menu option select ''Create Virtual Machine'' | ||
| − | * With the host selected in the Inventory panel, click on the '' | + | * With the host selected in the Inventory panel, click on the ''Create Virtual Machine'' link in the ''Commands'' section of the Summary or ''Virtual Machine'' page of the workspace. |
| − | When loaded, the | + | == Creating a New Virtual Machine == |
| + | |||
| + | When loaded, the ''Name and Location'' screen of the wizard will appear as follows: | ||
[[Image:vmware_server_2.0_new_virtual_machine.jpg|The VMware Server 2.0 New Virtual Machine wizard]] | [[Image:vmware_server_2.0_new_virtual_machine.jpg|The VMware Server 2.0 New Virtual Machine wizard]] | ||
| + | |||
| + | |||
| + | On this screen, the virtual machine should be given a suitably descriptive name such that it will be easily distinguished from other virtual machines running on the host. In addition, the datastore of the virtual machine (where files such as the virtual disk images will be stroed) also needs to be specified. By default a single datastore will have been specified during the VMware Server installation process. To add additional datastores simply click on the ''Add Datastore'' link in the ''Command'' section of the host Summary workspace and configure the desired storage location. | ||
| + | |||
| + | Once the virtual machine has been named and assigned a datastore, click next to configure the guest operating system type as illustrated in the following figure: | ||
| + | |||
| + | [[Image:vmware_server_2.0_guest_os.jpg|Configuring Virtual Machine Guest OS settings]] | ||
| + | |||
| + | |||
| + | |||
| + | [[Image:vmware_server_2.0_vm_cpu_memory.jpg|Configuring Virtual Machine Memory and CPU settings]] | ||
Revision as of 18:17, 29 September 2008
So far this book has focused on installing VMware Server 2.0 and gaining familiarity with the VI Web Access interface. The purpose of VMware Server is, of course, the creation of one or more virtual machines running guest operating systems. The VI Web Access management interface makes this task easy through the use of a wizard interface which guides the administrator though the step by step process of configuring and creating new virtual machines.
Accessing the Create Virtual Machine Wizard
The Create Virtual Machine wizard is launched from within the VMware Infrastructure Web Access interface (for more information on accessing and logging into VI Web Access read the chapter entitled A Guided Tour of the VMware Server 2.0 Infrastructure Web Access Interface).
Once logged into the VI Web Access interface, the New Virtual Machine wizard may be invoked in a number of different ways:
- From the Virtual Machine menu option select Create Virtual Machine
- With the host selected in the Inventory panel, click on the Create Virtual Machine link in the Commands section of the Summary or Virtual Machine page of the workspace.
Creating a New Virtual Machine
When loaded, the Name and Location screen of the wizard will appear as follows:
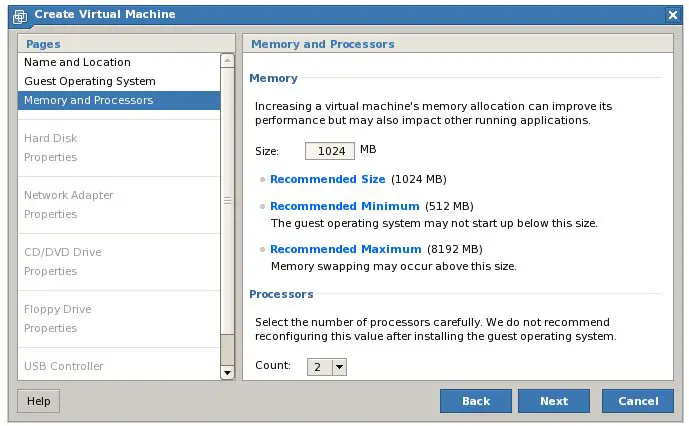
On this screen, the virtual machine should be given a suitably descriptive name such that it will be easily distinguished from other virtual machines running on the host. In addition, the datastore of the virtual machine (where files such as the virtual disk images will be stroed) also needs to be specified. By default a single datastore will have been specified during the VMware Server installation process. To add additional datastores simply click on the Add Datastore link in the Command section of the host Summary workspace and configure the desired storage location.
Once the virtual machine has been named and assigned a datastore, click next to configure the guest operating system type as illustrated in the following figure:


